


How to Configure DNS Security with Whitelist and Blacklist in SECUI
DNS Security in SECUI allows you to manually block or allow domains using whitelist and blacklist lists. This feature enhances DNS security control, especially for internal or malicious domains that are not listed in the default database.
This guide provides step-by-step instructions for configuring Defined DNS Security with images, from activation to testing.
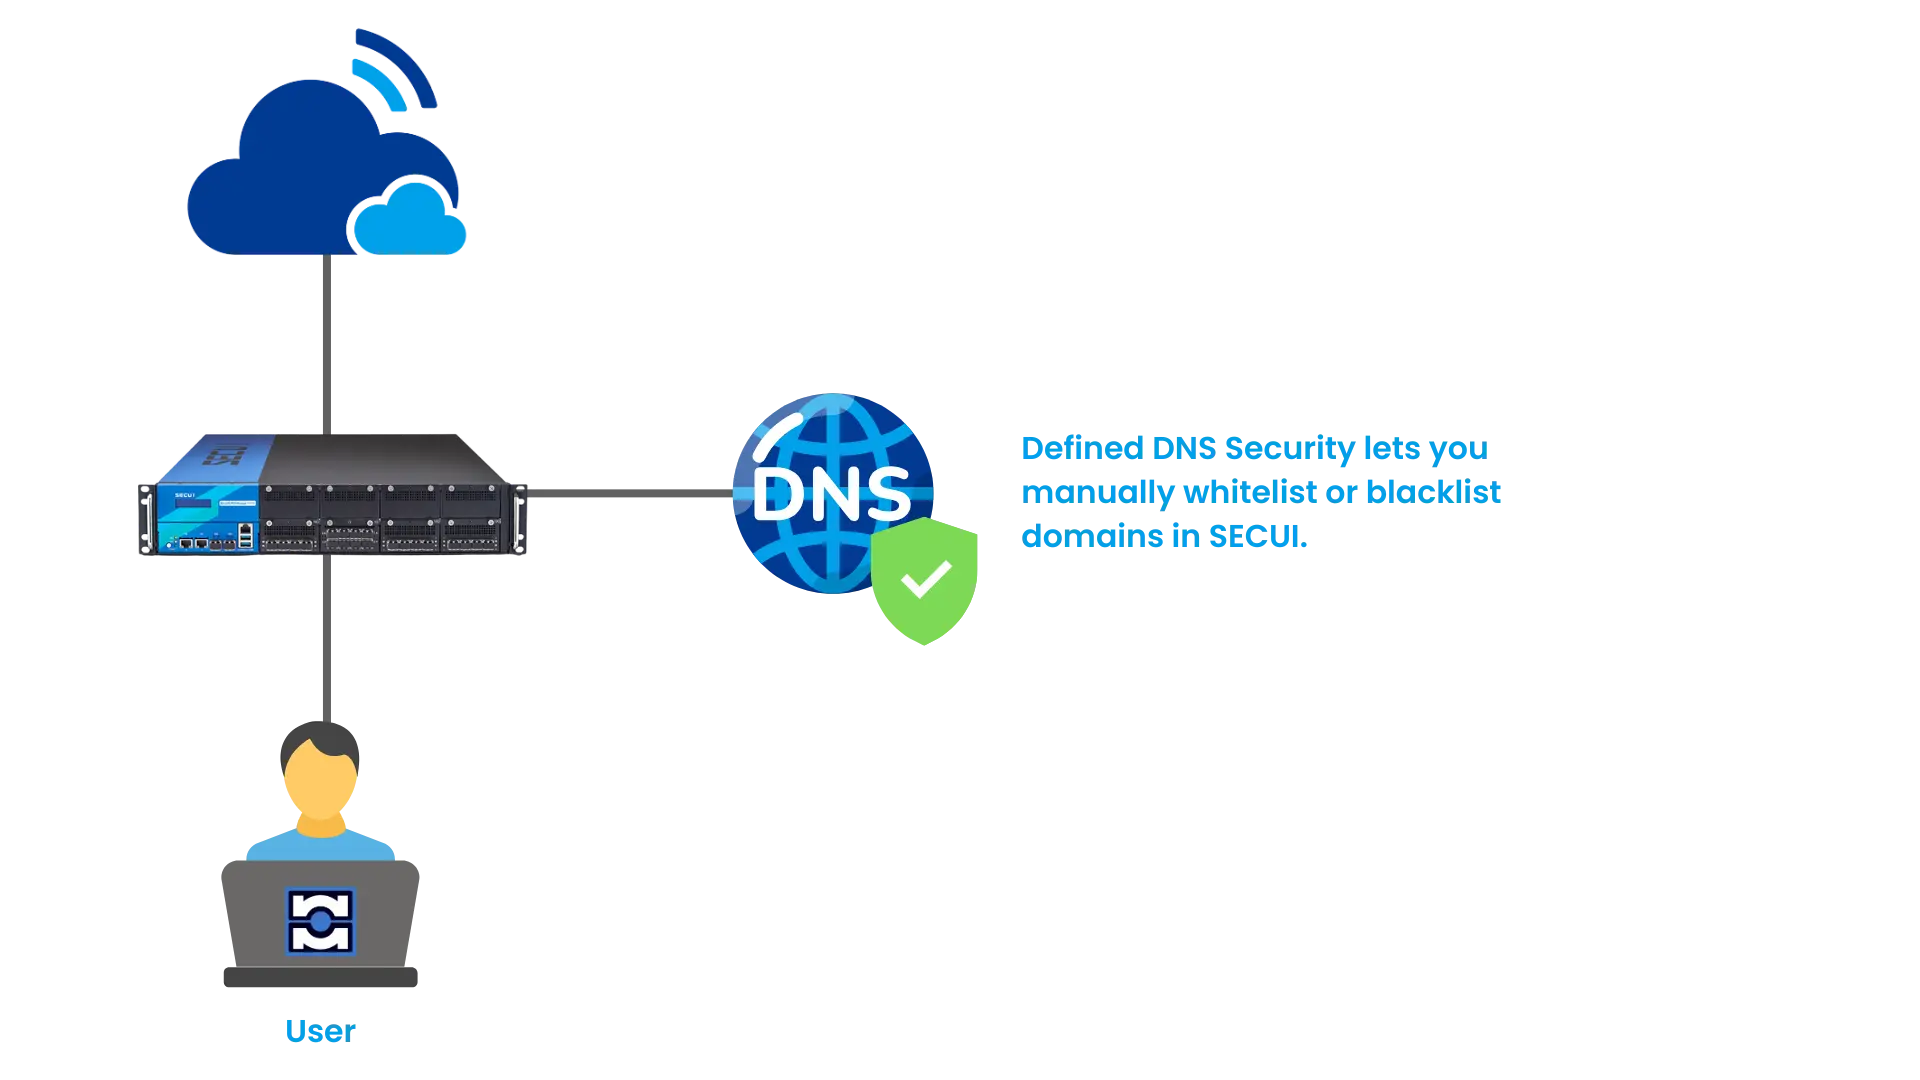
Figure 0.1 Topology of Defined DNS Security in SECUI
1. Log in to SECUI
Access the SECUI interface using an administrator account.

Figure 1.1 SECUI Login Screen
2. Enable DNS Security in General Settings
Navigate to:Object/Security Profile > DNS Security > DNS Security Common Settings
Enable the Enable DNS Security option to begin configuration.
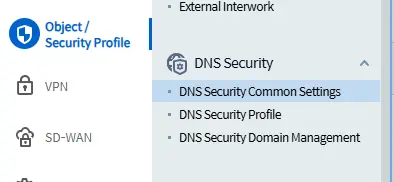
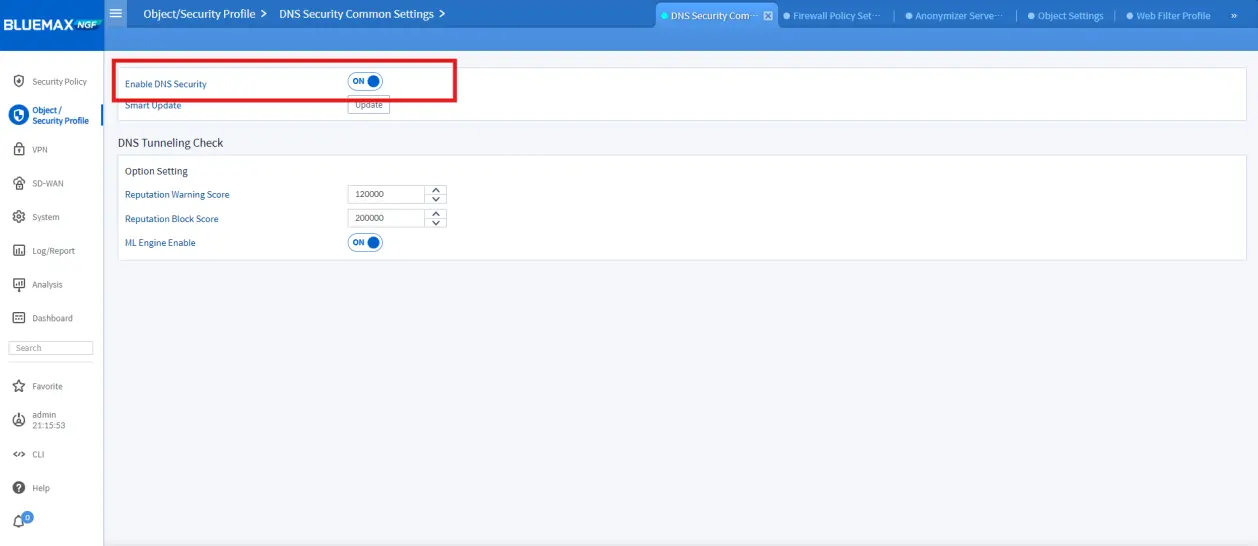
Figure 2.1 Enabling the DNS Security Feature
3. Add Domains to the Whitelist and Blacklist
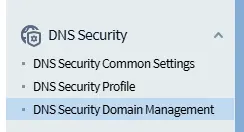
• Access the Domain Management Menu
Go to:Object/Security Profile > DNS Security > DNS Security Domain Management
• Add a New Domain
- Click Add, select Whitelist or Blacklist, then:
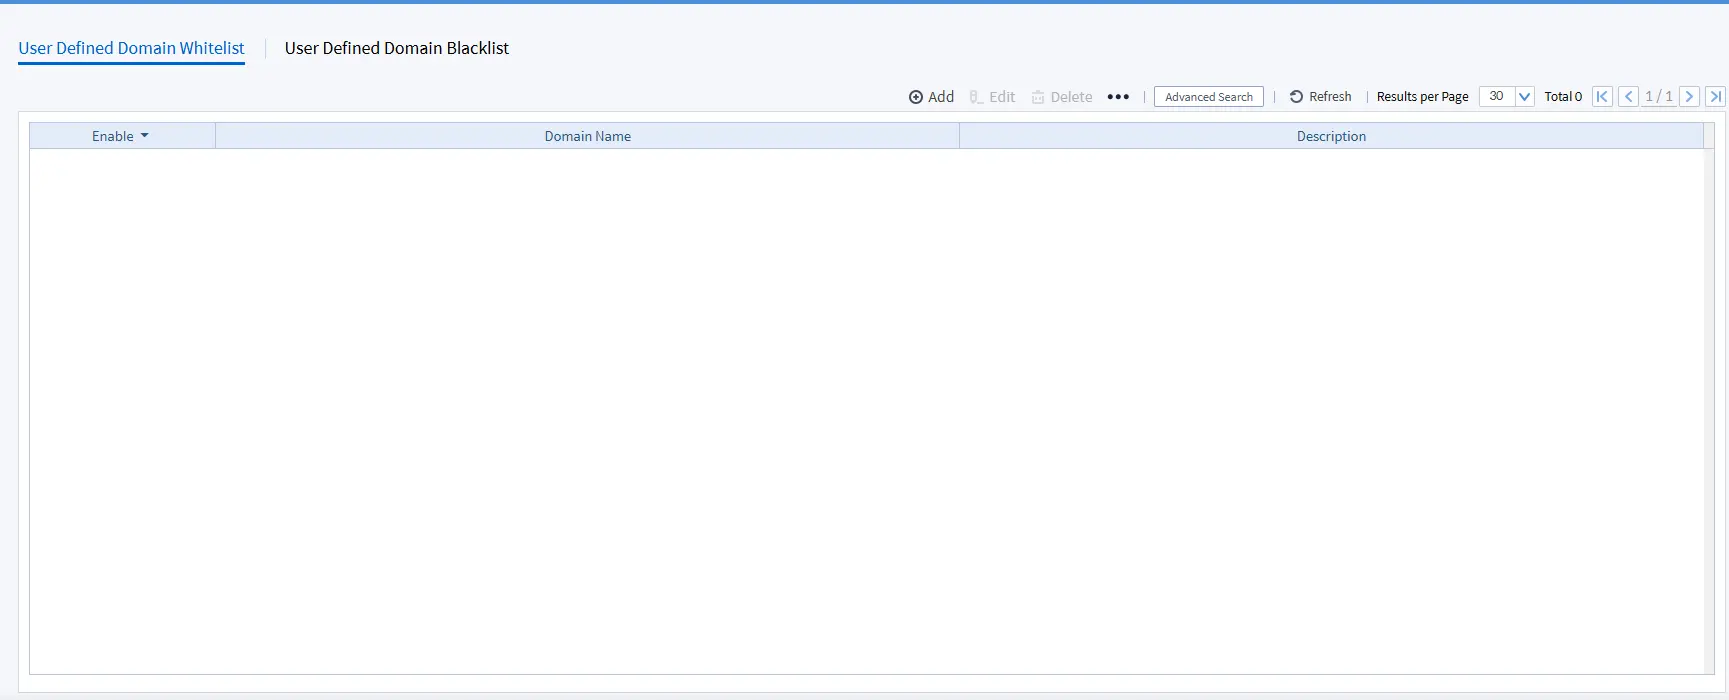
Figure 3.2 Manually Adding a Domain and Selecting Whitelist or Blacklist
- Enter the domain name (e.g.,
malifax.id)
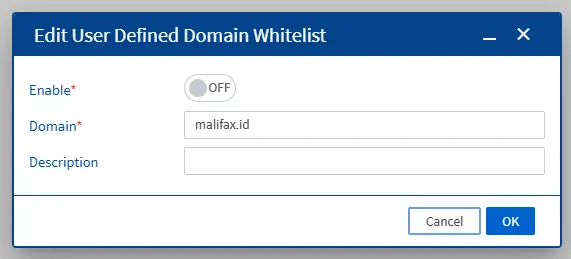
- Check the Enable box

Figure 3.4 Enabling the Entry with the Enable Checkbox
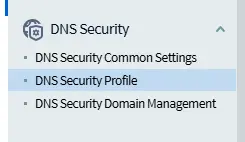
4. Create and Configure a DNS Security Profile
• Access the DNS Security Profile Menu
Object/Security Profile > DNS Security > DNS Security Profile
• Add a New Profile and Enable Custom Options
- Click Add +
- Profile name:
DNS Sec - Check:
Enable Profile - Enable:
User Defined Domain Whitelist/Blacklist - For blacklist: select the Block option

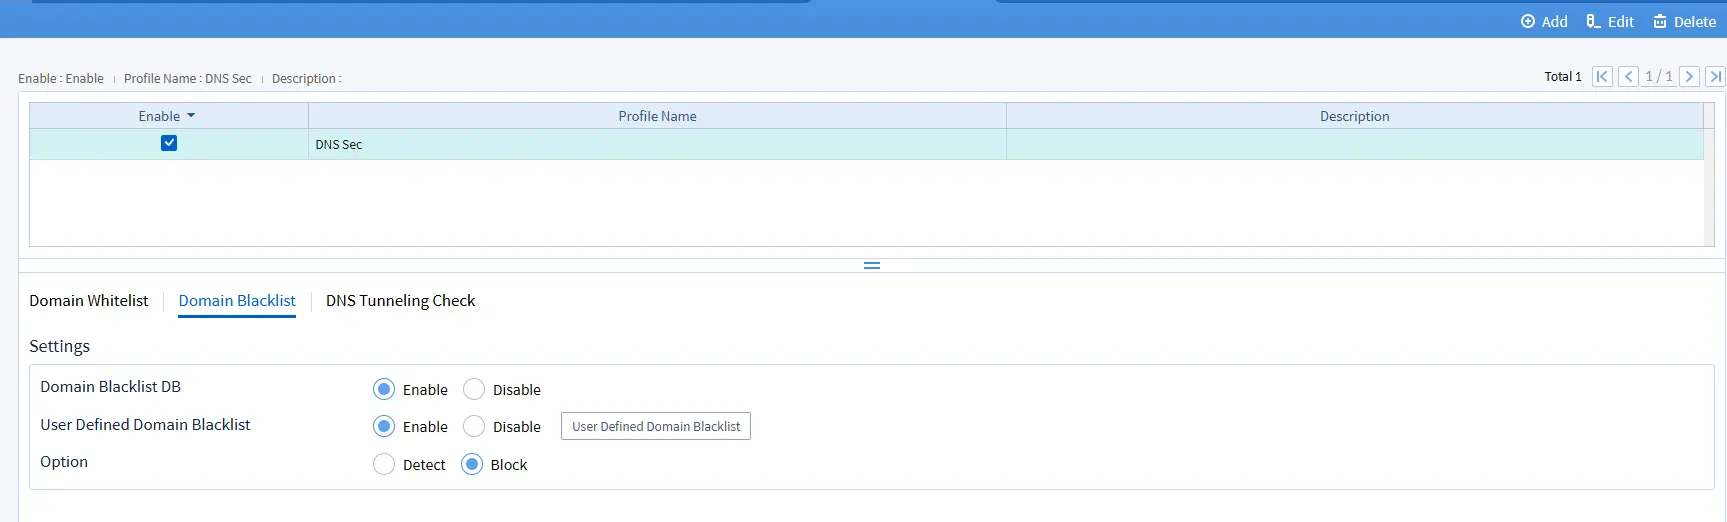
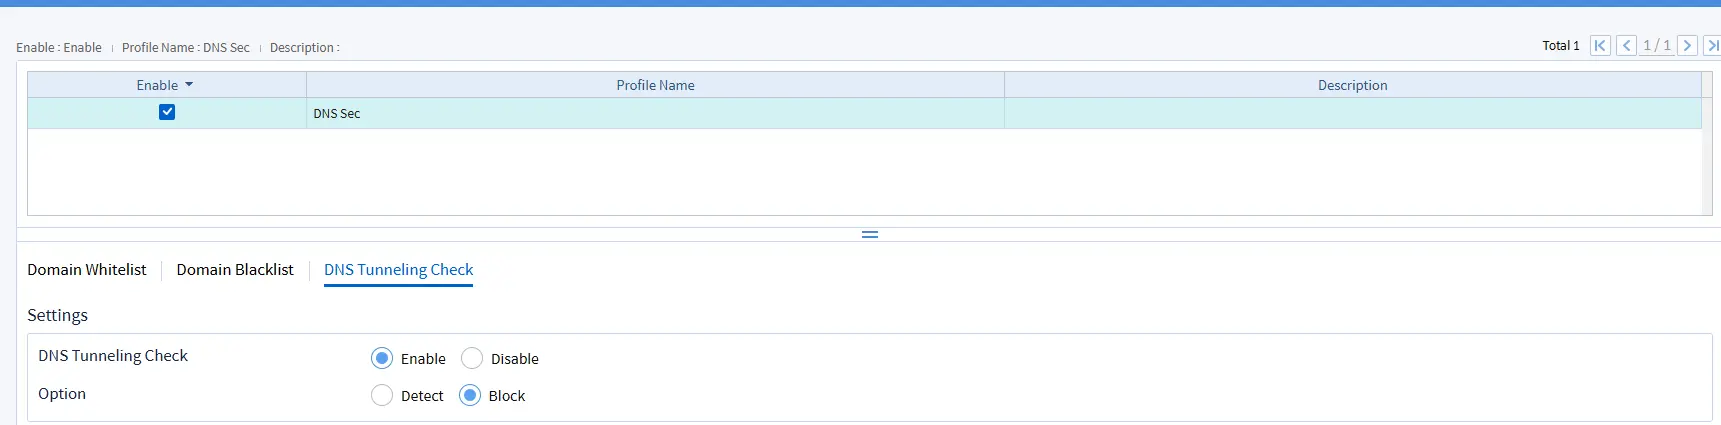
Figure 4.2 DNS Security Settings with Manual Domains
5. Test DNS Security Configuration
• Access a Blacklisted Domain
Use ping, a browser, or DNS lookup to attempt to access the blacklisted domain. It should fail or be blocked.

Figure 6.1 Testing Blocked DNS Access
• Verify in the Threat Log
Navigate to:Log/Report > Threat Log to check if the system recorded the blocking activity.
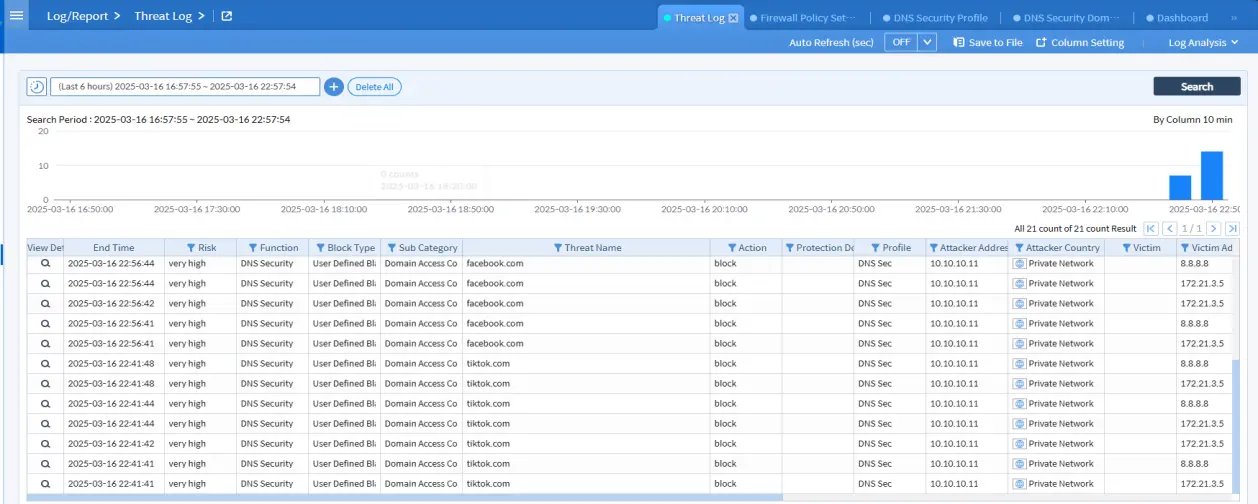
Figure 6.2 Log Result of DNS Security Blocking
Conclusion
By using Defined DNS Security in SECUI, you have full control over which domains can be accessed or blocked within your network. This feature strengthens DNS security while preventing unintentional blocks of important domains.
Regularly monitor and adjust your domain lists to ensure optimal protection.
📞 Need help configuring DNS Security?
Don't hesitate to contact our team!
Last Updated
May 23, 2025
Category
Network Security, DNS Security
Share This
On This Page
Contact us for
Free Consultation!
Share your challenges, and we'll provide the best solutions for your business, Connecting with us is as simple as clicking a button, and let us come to you.


